Ways To Achieve Classy And Sophisticated Results
Mastering
Most home recordists have hopes of perfecting their productions in the way of conducting mastering using their own studio computer. Yet only some achieve classy results that they are after. You may be wondering what you can achieve realistically by doing this on your own, along with what methods to use to obtain high-quality results.

Audio Mastering In Your Computer
Mastering is an essential portion involved in recording processes, to such a great extent that a high level of mythology happens to be linked to it. You have probably heard about the stories of the high-priced master engineers that use proprietary and mystical gear that is based on the old vacuum-tubes which were salvaged from an ancient Russian submarine, or something else along those lines. Yet you might have also heard about the computer home studio owners that use a dual track editor along with a couple of plug-ins that have learnt to master their own materials. What gives?
Are You Able To Do Mastering On Your Own At Home?
Before the age of the current Digital Revolution, audio mastering was associated with a defined and specific function set. You would give your completed mixes on a tape to a skilled mastering engineer. This professional would then bounce the mixes onto another tape using different types of signal processes which worked on sweetening the audio playback. The songs were then arranged into a desired order, while acetate style test-pressings were used to analyze a final product before mass production of the albums. Mastering at this stage was regarded rightly as a mystifying and arcane art. Not many musicians had available access to expensive and high-end tools required to conduct mastering. They also lacked the experience of a person that listens to countless recordings and had the skills to turn them into something for the real world.
However, today tools required for high-quality digital mastering are now within technical and financial reach for anyone that is serious about learning about mastering. Yet 95% of mastering has nothing to do with tools but rather it is about the ears. Unless you’re one of those people who have a trained ear like the mastering engineers, you cannot expect any type of ‘plug-in’ or software to offer this skill for you. The main objective for using mastering engineers has to do with an ear set that is objective to conduct any changes that are needed before the release.
This Buss in the Steinberg Cubase SX has a dedication to high-quality mastering effects. This is displayed in routing views of these inserts, an EQ1 equalizer plug-in will go before a L1 Limiter, just after a fader (displayed in white), and then comes a Double Delay with a UV22HR dithering software plug-in. These processes will ensure level-control will not cut the reverb-tail off or cause interference in the dithering.

Does all of this mean that only the experts should attempt to conduct mastering? No. To begin with, not every mastering situation will require that professional touch. Perhaps you have your own live recording that you plan to sell at a gig or give to your friends. You can choose to just duplicate the mix, yet a mastered %u201Cveneer%u201D will offer your listeners with a much better experience.
Or maybe you have recorded a number of tunes and you would like to conduct a test on how they will come together in the form of an album. You can choose to master these yourself. Once you have decided on the order and any other details, you can then take individual mixes or a mix to a professional mastering engineer. You can then talk to the mastering engineer about what you need in terms that are more educated. This is because you have started to familiarize yourself with these processes, and you would have listened to the mixes from the viewpoint of mastering.
As with anything else in life, you can only start to master a skill with practice. For many years, I would only use a professional mastering engineer, and I never entertained the thought trying to do mastering on my own. Yet I have since learnt much just from observing these professionals. I then started with mastering my materials. Today people are hiring my services in order to master their own records as they enjoy the results I have achieved. If you have doubts about your skills, rather hire a professional that will represent your work in a professional manner.
Most of the mastering is performed with the use of specialized Digital-Audio editing programs like Sound Forge, Sonic Foundry, Bias Peak, Steinberg, Adobe Audition, and more. These provide exceptional navigation facilities, abilities to zoom-in on the waveforms, pencil tools used for drawing out the clicks, and the plug-ins for the mastering tasks, and abilities for hosting third-party plug-ins.

 On top of making recordings of other people or just yourself, it can be handy to have some audio clips from online or local media. That used to be pretty simple, in Windows XP at least, but now it’s, unfortunately, harder to record any audio that your computer is playing into another application that’s running on that same computer. It’s not physically impossible, but Apple and Microsoft have both pretty much wiped out nearly every way in which we used to do this.
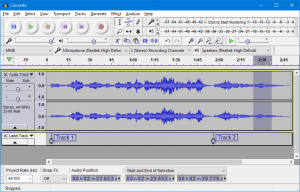 of the majority of software applications, then you’re going to end up with a file that could be multiple megabytes, even if the content is just a minute or two in length. On top of the sampling rate, be sure that you the settings are aligned for mono if you don’t want to record in stereo. Also, aim for as low a bitrate as you possibly can. For instance, when I record on my laptop, I don’t have the microphone jack that can do stereo, so I have little choice but to do mono recordings. For voice files, I put the sampling rate at 11025. When I save the file in a .mp3 format using


